Setting up AWS hosting can seem daunting for beginners. But it doesn’t have to be.
Also Read
With the right guidance, you can get started quickly and efficiently. AWS, or Amazon Web Services, is a powerful platform for hosting websites and applications. It offers scalable, reliable, and cost-effective solutions for businesses of all sizes. As a beginner, navigating through AWS’s vast array of services might feel overwhelming.
Don’t worry. This guide will break down the process into simple steps. You’ll learn how to set up your hosting environment, configure your settings, and deploy your application. By the end, you’ll feel confident using AWS for your hosting needs. Let’s dive in and make AWS hosting easy for you!
Creating An Aws Account
Visit the AWS website. Click on the “Create an AWS Account” button. Enter your email address. Choose a strong password. Confirm the password. Provide your account name. Click on “Continue”.
Enter your billing information. Fill in your address details. Select your payment method. You can use a credit card. Click on “Verify and Add”. Verify your phone number. Enter the code you receive. Click on “Verify Code”. Choose a support plan. Select the free plan if you are a beginner. Click on “Complete Sign Up”.
Understanding Aws Services
AWS offers many useful services. Amazon EC2 provides scalable computing power. Amazon S3 stores your data safely. Amazon RDS manages your databases. These services help you build and manage your website.
Choose services based on your needs. For basic websites, Amazon Lightsail is simple and easy. For more control, use Amazon EC2. To store files, Amazon S3 is a good choice. For databases, Amazon RDS works well. Pick services that fit your project. Start small and scale up as needed.
Setting Up Ec2 Instance
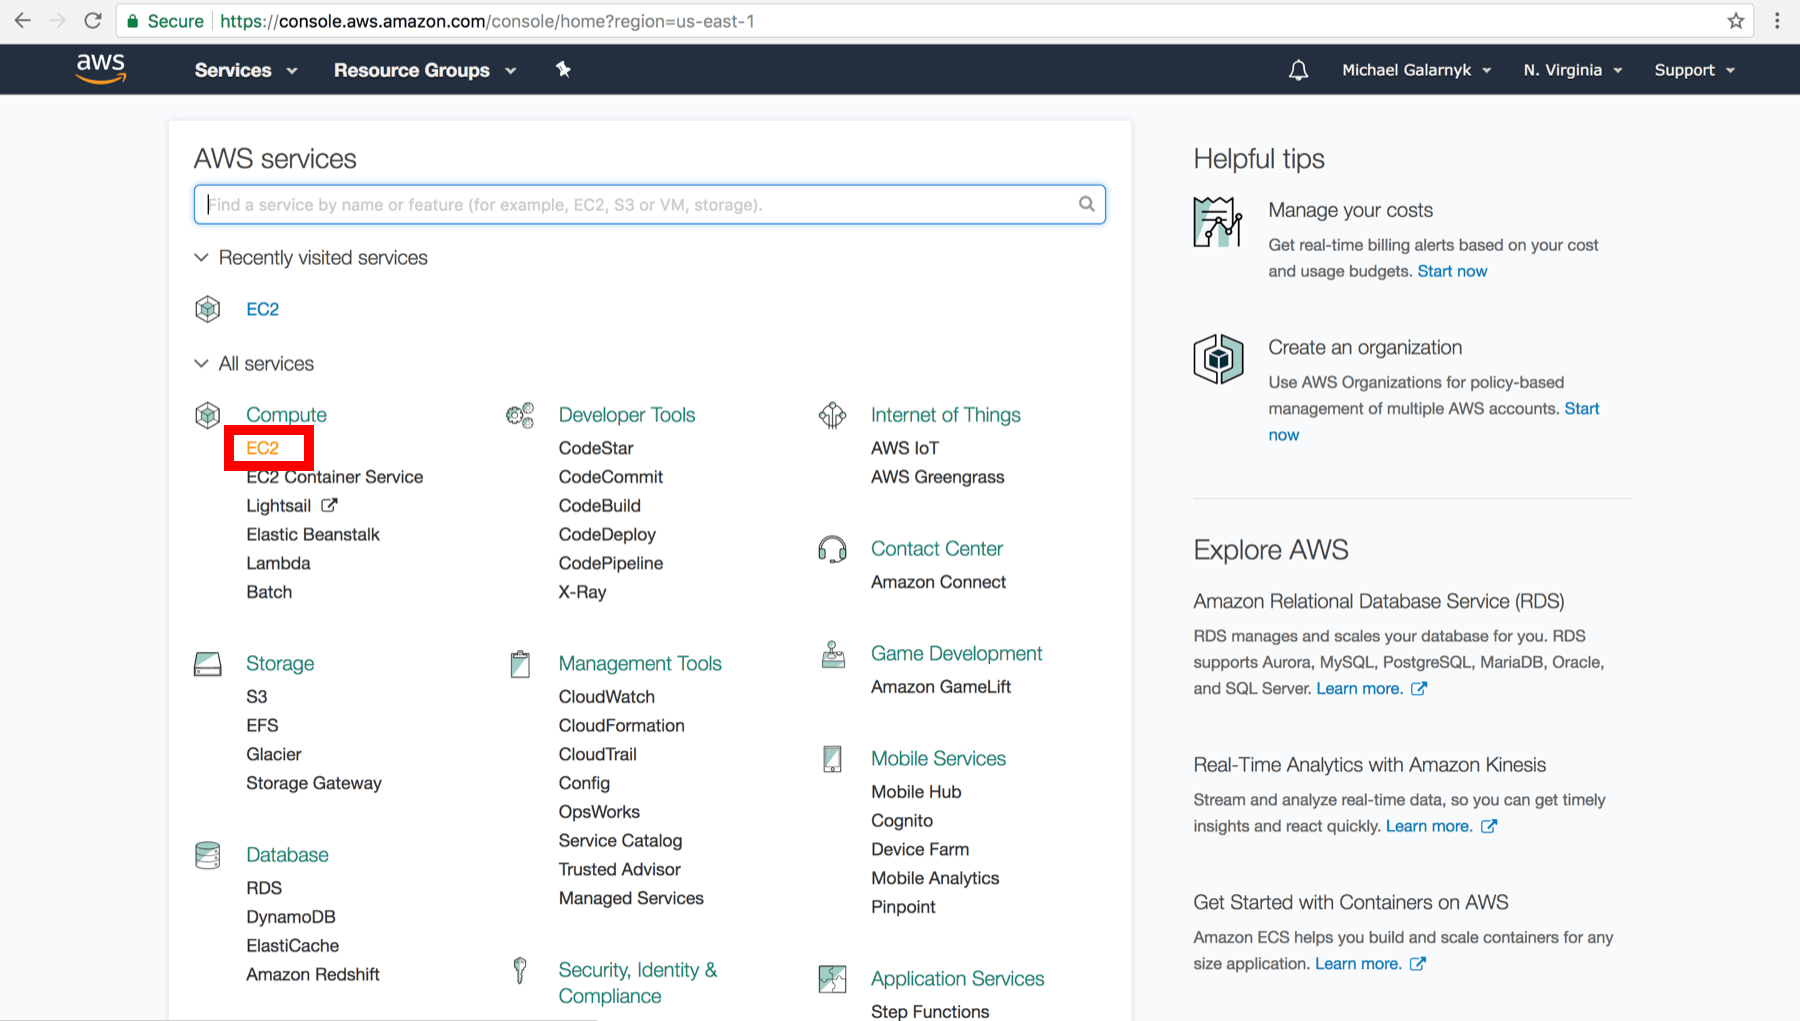
First, log into your AWS account. Go to the EC2 dashboard. Click “Launch Instance”. Choose an Amazon Machine Image (AMI). Select an instance type. Click “Next: Configure Instance Details”. Configure instance as needed. Click “Next: Add Storage”. Set storage options. Click “Next: Add Tags”. Add tags if needed. Click “Next: Configure Security Group”.
Security groups control traffic. Click “Add Rule”. Choose a rule type. Set the protocol and port range. Enter the source IP range. Add more rules if needed. Review your settings. Click “Review and Launch”. Finally, click “Launch”. Select a key pair or create a new one. Click “Launch Instances”. Your instance will start soon.
Connecting To Your Instance
Use SSH to connect to your AWS instance. First, open your terminal. Then, enter the command: ssh -i "your-key-pair.pem" ec2-user@your-instance-public-dns. Replace your-key-pair.pem with your actual key file name. Replace your-instance-public-dns with your instance’s public DNS name.
Open the AWS Management Console. Go to the EC2 Dashboard. Select your instance. Click on the “Connect” button. Choose the “EC2 Instance Connect” tab. Click on the “Connect” button again. You will now be connected to your instance.
Setting Up A Web Server
First, connect to your AWS EC2 instance. Use SSH for this. Then, update your package lists. Run sudo apt-get update. Next, install Apache or Nginx. For Apache, use sudo apt-get install apache2. For Nginx, use sudo apt-get install nginx. After installation, start the server. For Apache, run sudo systemctl start apache2. For Nginx, run sudo systemctl start nginx. Ensure the server starts on boot. For Apache, use sudo systemctl enable apache2. For Nginx, use sudo systemctl enable nginx.
First, upload your application files. Use SCP or FTP. Place them in the web directory. For Apache, use /var/www/html. For Nginx, use /usr/share/nginx/html. Next, configure the web server. Edit the configuration files. For Apache, edit /etc/apache2/sites-available/000-default.conf. For Nginx, edit /etc/nginx/sites-available/default. Restart the server to apply changes. For Apache, run sudo systemctl restart apache2. For Nginx, run sudo systemctl restart nginx. Finally, check your application in a browser. Use your public IP address.

Credit: www.datacamp.com
Configuring Dns With Route 53
Setting up AWS hosting for beginners involves configuring DNS with Route 53. It allows easy management of your domain’s DNS settings. Route 53 ensures your website is reachable to users worldwide.
Registering A Domain
First, log in to your AWS account. Go to the Route 53 service. Click on “Register Domain”. Choose your domain name. Check if it’s available. If yes, add it to your cart. Fill in your details. Complete the payment process. Your domain is now registered.
Routing Traffic
Next, create a hosted zone. This links your domain to Route 53. Go to Route 53 dashboard. Click “Create Hosted Zone”. Enter your domain name. Click “Create”. Now, add a record set. Choose the type of record (like A or CNAME). Enter the target IP address or DNS name. Save the record. Your traffic is now routed.
Monitoring And Scaling
Amazon CloudWatch helps you keep an eye on your AWS resources. It collects and tracks metrics. You can set alarms. Get notifications if something goes wrong. It provides a dashboard. See all your data in one place. This makes it easy to monitor the health of your applications. You can also log files. This helps in troubleshooting issues quickly. CloudWatch is a powerful tool for managing your AWS environment.
Auto Scaling adjusts your resources automatically. It ensures your application runs smoothly. When traffic increases, Auto Scaling adds more instances. When traffic decreases, it removes instances. This saves money. You only pay for what you use. Auto Scaling keeps your application available. Even during peak times. Set up Auto Scaling groups. Define rules for scaling. It is an essential feature for managing AWS resources efficiently.

Credit: ajitfawade.medium.com

Credit: www.youtube.com
Frequently Asked Questions
What Is Aws Hosting?
AWS hosting is a cloud service provided by Amazon. It offers scalable computing power, storage, and other resources. It’s ideal for hosting websites, applications, and data.
How To Create An Aws Account?
To create an AWS account, visit the AWS website. Click on “Create an AWS Account” and follow the instructions. You’ll need an email address and a credit card.
What Are The Benefits Of Aws Hosting?
AWS hosting provides scalability, reliability, and security. It also offers flexible pricing models. Users can pay only for the resources they use.
How To Set Up An Aws Ec2 Instance?
To set up an AWS EC2 instance, log in to the AWS Management Console. Select EC2, choose an AMI, and configure the instance settings. Launch the instance.
Conclusion
Setting up AWS hosting can seem tough at first. But with practice, it becomes easier. Start small and take each step slowly. Follow the guide and you’ll have your site up in no time. AWS offers many resources and support.
Don’t hesitate to use them. Remember, patience and practice are key. Happy hosting!


