Setting up cloud hosting on Amazon AWS can seem complex. But it’s manageable with the right guidance.
Also Read
Amazon Web Services (AWS) is a leading cloud service provider. It offers powerful tools and services for cloud hosting. Configuring cloud hosting on AWS may sound daunting. Yet, with a clear step-by-step approach, it becomes simpler. This guide will help you understand the basics.
You will learn how to set up your cloud environment efficiently. Whether you’re a beginner or have some experience, this blog post will provide valuable insights. Let’s dive in and explore how to configure cloud hosting on Amazon AWS.
Introduction To Cloud Hosting
Cloud hosting uses many servers to host websites. The servers are in different places. This makes it reliable. If one server fails, others take over. Many businesses use cloud hosting. It is flexible and scalable. You can add more resources when needed.
Cloud hosting has many benefits. It is cost-effective. You pay for what you use. It is also fast. Websites load quickly. Security is strong. Data is safe and backed up. Flexibility is another benefit. Resources can be changed as needed. Finally, it supports high traffic. Websites stay up even with many visitors.
Getting Started With Amazon Aws
First, visit the AWS website. Click the “Create an AWS Account” button. Fill out the required information. This includes your name, email, and password. You will need to provide a credit card for billing. AWS offers a free tier, but a card is still needed. Verify your account through the email sent by AWS.
Once logged in, you will see the AWS Management Console. It has many services and options. The top search bar helps you find any service quickly. The services menu is on the top left. It lists all AWS services. The dashboard shows your recent activity and key information. Use the navigation bar to switch between different AWS services.
Setting Up Your First Ec2 Instance
First, pick an Amazon Machine Image (AMI). This is a template. It includes an operating system. It also has application servers. Select one that suits your needs. Options include Linux and Windows. You can also choose pre-configured AMIs. These have software like WordPress or Docker.
Next, configure the instance details. Select the number of instances you need. Choose the instance type. This affects performance and cost. Set the network settings. Attach a security group for protection. Review your settings before proceeding.
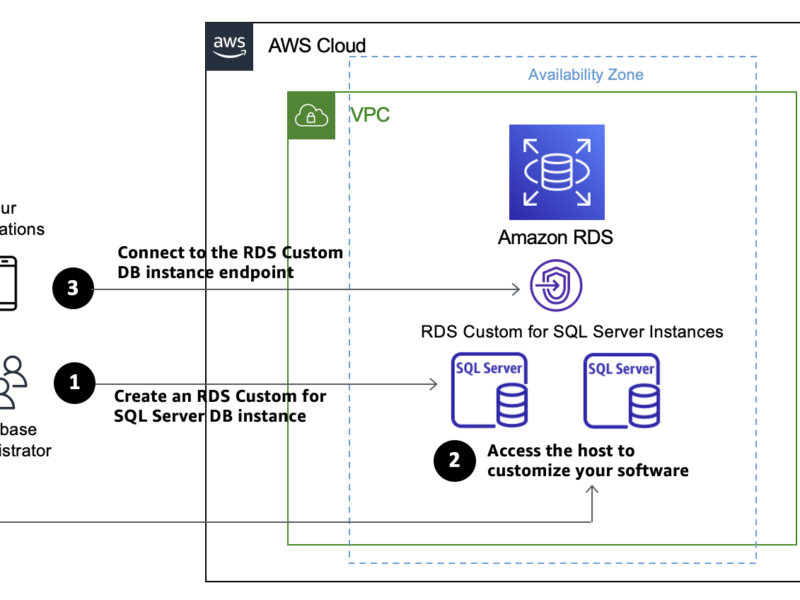
Now, add storage. This is the disk space for your instance. Choose the size and type of storage. Options include SSD and HDD. More storage can be added later if needed. Finally, review all settings. Launch the instance. Your EC2 is now ready.
Configuring Security Groups
Security groups act as a virtual firewall. They control traffic for your instances. Each group contains rules. These rules allow or deny incoming and outgoing traffic. By default, all inbound traffic is blocked. Outbound traffic is allowed.
Each instance can have multiple security groups. Security groups are stateful. If you allow an incoming request, the response is automatically allowed. No need to set up a rule for the response. This makes it easier to manage.
To set up rules, go to the AWS Management Console. Select your instance. Choose the security group tab. Click on “Edit inbound rules” or “Edit outbound rules”. Add a new rule. Choose the type of traffic. Specify the protocol and port range. Set the source or destination.
For inbound rules, the source could be an IP range or another security group. For outbound rules, the destination could be an IP range or another security group. Save the rules. These rules will now control the traffic for your instance.
Launching And Connecting To Your Ec2 Instance
Before launching, check all settings. Make sure everything is correct. This includes the instance type, security groups, and key pairs. Look for any errors or missed steps. Double-check the details.
Click the “Review and Launch” button. A summary of your configuration will appear. This is your last chance to make changes. If everything looks good, click “Launch”. Your instance will start.
To connect, you need a secure shell (SSH) client. Windows users can use PuTTY. Mac and Linux users can use the terminal.
Find your instance’s public IP address. Open your SSH client. Type in the command ssh -i "your-key.pem" ec2-user@your-instance-ip. Replace your-key.pem with your key file. Replace your-instance-ip with your instance’s IP.
Press Enter. If this is your first connection, you might see a warning. Type “yes” to continue. Now you are connected to your EC2 instance.

Credit: www.amazonaws.cn
Setting Up A Scalable Web Server
First, launch an EC2 instance from the AWS console. Choose an Amazon Machine Image (AMI). Select an instance type that meets your needs. After that, configure the instance details. Make sure to add storage and tags. Finally, configure the security group. Allow HTTP and HTTPS traffic.
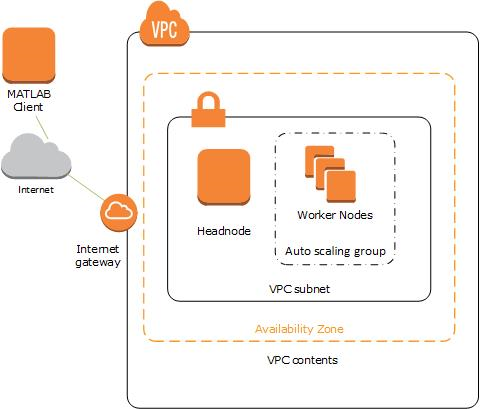
Create a launch configuration. This template is for your EC2 instances. Define the instance type and key pair. Use the same AMI you chose earlier. Set up an auto scaling group. Specify the number of instances to start with. Define the scaling policies. This will help maintain the right number of instances. Scaling up or down based on traffic. Your web server will be scalable and reliable.
Managing Aws Resources
AWS offers tools to help you monitor your cloud resources. Use CloudWatch to track performance. Set up alerts for unusual activity. Get notified when something goes wrong. This helps you keep your services running smoothly. Always stay informed about your system’s health.
Control your spending on AWS with budgeting tools. Use AWS Budgets to set cost limits. Receive alerts when you approach your budget. Optimize resource usage to save money. Review your bills regularly. Look for unused resources. Delete them to avoid extra charges.

Credit: www.mathworks.com
Advanced Aws Configurations
Load balancing helps distribute traffic evenly. This prevents any single server from being overwhelmed. AWS offers Elastic Load Balancing (ELB). ELB automatically spreads incoming traffic. It ensures high availability and reliability. Using ELB can improve the performance of your applications. It also supports auto-scaling. This means your resources can grow as needed.
A CDN helps deliver your content faster. Amazon CloudFront is a CDN service provided by AWS. It uses edge locations worldwide. Content is cached and delivered from these edge locations. This reduces latency and speeds up content delivery. CloudFront works well with other AWS services. It helps secure your content with encryption and access controls. Using a CDN can greatly improve user experience.

Credit: aws.amazon.com
Frequently Asked Questions
How Do I Start With Aws Cloud Hosting?
To start with AWS cloud hosting, create an AWS account. Then, choose your hosting service and configure your instance.
What Are The Benefits Of Aws Cloud Hosting?
AWS cloud hosting offers scalability, flexibility, and cost-effectiveness. It also provides robust security and a global presence.
How Do I Configure Aws Ec2 Instance?
To configure an AWS EC2 instance, select the instance type, configure network settings, and launch the instance.
Is Aws Cloud Hosting Secure?
Yes, AWS cloud hosting is secure. It offers advanced security features, including encryption, compliance certifications, and network firewalls.
Conclusion
Configuring cloud hosting on Amazon AWS is straightforward. It offers flexibility and reliability. AWS services can scale with your needs. The platform supports various applications and workloads. Follow the steps outlined in this guide. Your hosting setup will be effective and efficient.
AWS provides extensive documentation and support. This ensures you have all necessary resources. Start configuring your cloud hosting today. Enjoy the benefits of AWS.


