Guide on Creating And Configuring Databases? Creating and configuring databases involves defining a database structure. It also involves setting up the required services. Steps include software installation, server setup, database creation, and permissions configuration.
Also Read
To master database creation and configuration, one must understand that databases are the backbone of many applications. A well-structured database is crucial for efficient data management. It powers dynamic websites and serves as the foundation for software systems.
In our always-changing digital world, data reigns supreme. Understanding how to create and configure databases effectively is a highly sought-after skill. The ability to navigate the intricacies of database setup is invaluable.
Whether you’re a developer, a system administrator, or simply a curious learner. Therefore, you should become familiar with database management systems like MySQL.
Also, PostgreSQL and Microsoft SQL Server are important. Executing proper configuration steps ensures optimal performance. It also secures your data. This guide aims to equip readers with the essential know-how. They can start configuring their databases with confidence and precision.
Table of Contents
Introduction To Database Creation
Diving into the world of databases marks the start of an exciting journey. It equips people with the power to organize, store, and manage data efficiently. The creation and configuration of databases is crucial. This guide simplifies the process step by step.
Importance of Databases In Modern Computing
Databases lay the foundation for modern computing. They are vital for storing vast amounts of information securely. They also make it readily accessible. Almost every application today relies on databases to function correctly.
- Centralized data storage
- Quick data retrieval
- Efficient data management
- Concurrent data access
- Data integrity and security
Types Of Databases: Relational Vs. Non-relational
Relational databases use tables to store data. They rely on a structure with defined relationships between data items. Structured Query Language (SQL) is their go-to language.
Non-relational databases, also known as NoSQL, handle unstructured data. They are more flexible and allow storing data as key-value pairs, graphs, or wide-column stores.
| Database Type | Characteristics | Examples |
|---|---|---|
| Relational | Structured, Table-based | MySQL, PostgreSQL |
| Non-Relational | Flexible, Various data models | MongoDB, Cassandra |

Credit: techcommunity.microsoft.com
Choose The Right Database Software
Deciding on the perfect database software is vital. A reliable database lays the foundation for storing and managing data efficiently. This section will guide you through selecting the best Database Management System (DBMS) for your needs.
Popular Database Management Systems
Different DBMS cater to various requirements. Here’s a list of some well-known ones:
- MySQL: Great for web applications
- Oracle: Ideal for large enterprises
- Microsoft SQL Server: Suited for Windows-based systems
- PostgreSQL: Known for its open-source nature
- MongoDB: Fits well with Big Data projects
Factors To Consider When Selecting A Dbms
Choosing the right DBMS requires thoughtful consideration. Here are key factors to weigh:
| Factor | Why It Matters |
|---|---|
| Scalability | Ensures the system grows with your data needs. |
| Performance | Affects the speed of data retrieval and storage. |
| Security | Protects your data from unauthorized access. |
| Cost | Includes licensing and operating expenses. |
| Support | Access to assistance whenever issues arise. |
Setting Up The Database Environment
Before diving into the ocean of data, let’s set up the perfect environment for our database. Think of it as preparing the soil before planting seeds. We need the right tools and conditions for our database to grow and thrive. Follow these steps to create a solid foundation.
Installing Database Software
First, we need to install our database software. This is like picking the best shovel for our gardening.
- Choose the database you need. Will it be MySQL, PostgreSQL, or another?
- Download the software from the official website.
- Run the installer. Follow the on-screen instructions.
- Finish the setup and make sure the database service starts.
Now, our database software is ready to store information.
Configuring Network And Security Settings
Next, we secure our garden. We must build a fence to keep our data safe. Here’s how we do this in the digital world.
| Task | Action |
|---|---|
| Set a password | Choose a strong password for your database. |
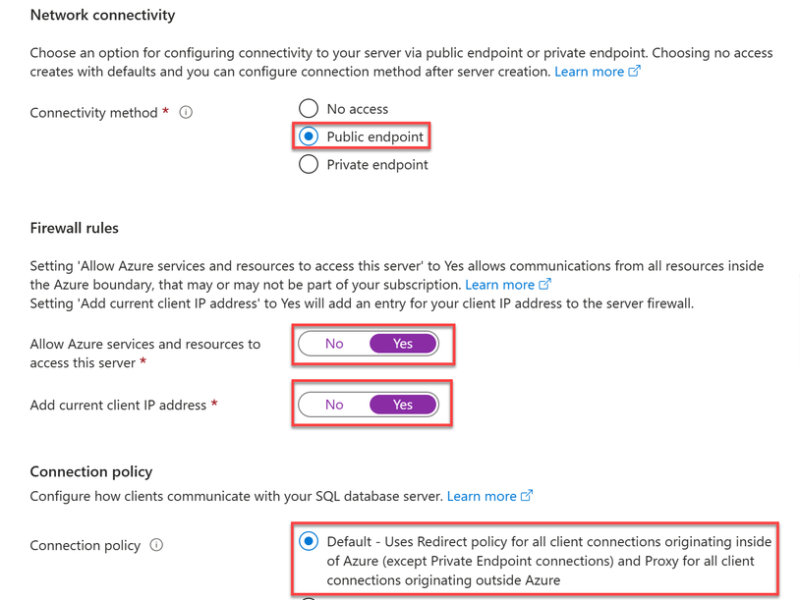
| Adjust network settings | Make sure your database can only be accessed by authorized users. |
| Update firewall rules | Only allow necessary network traffic to your database. |
With these steps completed, your database garden has strong defenses. You’re now ready to plant your data seeds!

Credit: www.youtube.com
Designing The Database Schema
Embarking on the journey of designing a database schema is akin to laying the foundation for a building. It necessitates careful planning and precise execution. Here, we’ll delve into the principles that govern the design of a stable and efficient database. Then, we’ll cover the nuts and bolts of creating tables and their relationships.
Principles Of Database Design
Before you start jotting down tables and columns, grasp the core principles of database design. Doing so ensures your database performs well and scales with ease. These principles include:
- Consistency: Ensure data format consistency for accuracy.
- Integrity: Protect data integrity with constraints.
- Efficiency: Design for optimal query performance.
- Scalability: Plan for future data growth.
- Simplicity: Keep the design as simple as possible.
- Flexibility: Allow for changes with minimal impact.
Creating Tables And Relationships
Tables form the skeleton of your database where data resides. Here’s how to create them:
- Identify each piece of data needed.
- Group related data into tables.
- Define primary keys for uniqueness.
- Choose appropriate data types for columns.
Building relationships is next. They link tables together, forming a coherent system. Follow these steps:
- Define foreign keys to connect records.
- Establish the type of relationship: one-to-one, one-to-many, or many-to-many.
- Use JOIN operations to retrieve related data.
Remember, an effective schema balances form and function, leading to a robust, streamlined database.
Database User Management
Managing database users is critical for a secure and smooth database. This section of your guide explains how to create user accounts. It also covers how to assign roles and manage privileges effectively. Master these tasks to maintain a robust and secure database system.
Creating User Accounts
Every database system relies on user accounts to control access. It is simple to create new user accounts. Follow this process using your database’s administrative tools:
- Access the database control panel.
- Navigate to the user management section.
- Click on ‘Create User’ or a similar option.
- Fill in the user details:
| Field | Description |
|---|---|
| Username | Name for the user account. |
| Password | A strong, unique password. |
| Contact email for the user. |
Once completed, save the new user account with the provided button like ‘Save’ or ‘Create’.
Assigning Roles And Privileges
Roles and privileges determine what a user can do in the database. They keep your data safe. Assign them carefully. Follow these guidelines:
- Use the administrative panel to find the user.
- Select the option to modify roles/privileges.
- Choose the appropriate roles from the list provided.
- Apply the changes to update user access levels.
Common roles include:
- Administrator – Full system access.
- Editor – Edit but not delete data.
- Viewer – View data without changes.
Repeat these steps for each user, ensuring all have the correct privileges.
Data Manipulation And Management
Adept database administration ensures data remains both flexible and secure. Manipulation and management are key, enabling seamless data flow. Learn how to insert, update, and delete data. Also, discover tips for effective data import and export. This guide simplifies these crucial tasks.
Inserting, Updating, And Deleting Data
Inserting data means adding new records. Execute this via SQL INSERT statements or through a database GUI.
Updating data changes existing records. SQL UPDATE statements or database tools can be used here.
Deleting data removes unwanted records, typically with the SQL DELETE command.
| Action | SQL Command | GUI Option |
|---|---|---|
| Insert Data | INSERT INTO |
Form or wizard |
| Update Data | UPDATE |
Edit inline or form |
| Delete Data | DELETE |
Delete key or button |
Importing And Exporting Data
Importing involves adding external data to your database. Tools and wizards guide the process.
Exporting allows for data transfer out of your database. Use it for backups or for sharing information.
- SQL imports: Load data using SQL’s
LOAD DATAorIMPORTcommand. - Graphical tools: Utilize built-in import/export features for simplicity.
- CSV and SQL files are common formats used during these operations.
Implementing Security Measures
Implementing Security Measures is a crucial step in protecting your database. With rising cyber threats, keeping your data safe is top priority. Follow these steps to ensure robust database security.
Encryption And Data Protection
Encryption is your data’s best friend. It turns information into code that only authorized individuals can read. Implement encryption at two levels:
- Data-at-Rest: Encrypt data that is stored and not moving.
- Data-in-Transit: Encrypt data being sent over networks.
Use strong encryption protocols like AES and RSA. Ensure to manage keys securely.
Regular Backups And Disaster Recovery Plans
Backups are not optional; they’re essential. Backing up your database prevents data loss in case of failure. Schedule regular backups and test them often.
- Perform daily incremental backups.
- Have weekly full backups.
- Store backups in multiple locations.
Have a disaster recovery plan. It helps you react fast and restore data if needed. Document your plan and train your team on it.
Maintenance And Performance Tuning
Once you create and configure a database, your work isn’t over. Next comes maintenance and performance. Think of it as a car service. Regular checks keep it running fast and smooth.
In this section, we’ll guide you through steps to maintain your database. We’ll also share tips on how to tune its performance. Let’s keep that database engine in top shape!
Monitoring Database Performance
Tracking how your database performs is crucial. It helps spot problems before they grow. Think of this as your database’s health check-up.
- Use monitoring tools to watch for slow queries.
- Check error logs for any unusual activity.
- Track resources like CPU and memory. Make sure they’re not overworked.
These steps help keep your database running without hiccups.
Routine Maintenance Tasks
Regular maintenance is the backbone of smooth performance. Here are key tasks you should perform:
- Update statistics. This helps the database plan out how to find data.
- Defragment indexes. Over time, data gets scattered. Put it back in order.
- Backups. Always have a recovery plan. Save your data regularly.
Routine tasks keep your database in prime condition. Don’t skip them!
Advanced Configurations
Welcome to the ‘Advanced Configurations’ section of our database creation and setup guide. This part dives into essential techniques that will optimize database performance. We’ll cover replication setup and automating routine tasks. Perfect for ensuring your database is always efficient, secure, and running smoothly.
Setting Up Replication
Database replication enables data from one database to automatically copy to another. This ensures high availability and disaster recovery. Here’s a simple breakdown:
- Choose your replication model: Master-slave or master-master are popular choices.
- Configure the master database: Adjust settings to allow data copying.
CREATE USER 'replicant'@'%' IDENTIFIED BY 'password';

GRANT REPLICATION SLAVE ON . TO 'replicant'@'%';- Set up the slave database: Connect it to the master by providing the necessary credentials.
CHANGE MASTER TO
MASTER_HOST='master_ip',
MASTER_USER='replicant',
MASTER_PASSWORD='password',
MASTER_LOG_FILE='recorded_log_file_name',
MASTER_LOG_POS=recorded_log_position;- Start the replication process with the
START SLAVEcommand.
Automating Routine Tasks
Routine tasks can be scheduled to maintain optimal database performance without manual intervention. Here’s how to automate them:
- Backup: Schedule daily backups to prevent data loss.
- Updates: Regularly apply updates to keep database secure.
- Maintenance: Set tasks for indexing and cleaning up.
For most database systems, you can use built-in tools like:
| Tool | Use |
|---|---|
| Cron Jobs | For Linux based systems, to schedule scripts. |
| SQL Server Agent | For Microsoft SQL Server, to execute tasks. |
Here’s a sample cron job to run a backup script daily at midnight:
0 0 /path/to/backup_script.sh
Troubleshooting Common Issues
Encountering difficulties with databases can be frustrating. This section provides step-by-step advice to help resolve two typical issues.
Diagnosing Connectivity Problems
First, let’s tackle connectivity issues. They often prevent access to your database.
- Check if the database server is running.
- Verify network connections.
- Use ping tests to confirm server responsiveness.
- Review authentication credentials.
- Examine firewall settings that may block access.
- Consult the server’s error log for clues.
SELECT host, user FROM mysql.user WHERE user = 'your_username';
The above SQL command helps review access permissions.
Handling Data Consistency Errors
With data consistency errors, your database might not operate correctly.
- Identify the affected tables and records.
- Check if data types are correct and match application needs.
- Ensure all mandatory fields contain data.
- Perform data validation checks for duplicates and nulls.
- Look for foreign key violations.
- Use transactions to maintain integrity during operations.
CHECK TABLE your_table_name;
Run the above SQL command to inspect table issues.
Conclusion And Next Steps
Congratulations on reaching the end of this guide to creating and configuring databases! You now have the tools needed to embark on your data management journey. But remember, this is just the beginning.
Continuous learning and keeping up-to-date with the latest resources will strengthen your skills. Let’s wrap up the key takeaways and look at ways to continue growing your database expertise.
Review Of Key Considerations
We covered essential steps to create and set up a database:
- Choose the right database system.
- Install and set up the necessary software.
- Design a logical schema.
- Create tables, relationships, and indexes.
- Input and manage data securely.
- Backup to prevent data loss.
Keep these steps handy as a checklist for future projects.
Continuing Education And Resources
Expand your knowledge with these steps:
- Practice with different database software.
- Enroll in online courses that challenge you.
- Read books by data experts.
- Join forums and communities.
- Subscribe to industry blogs and newsletters.
- Attend workshops and conferences.
Consistent practice and learning from a variety of sources will boost your database proficiency exponentially.

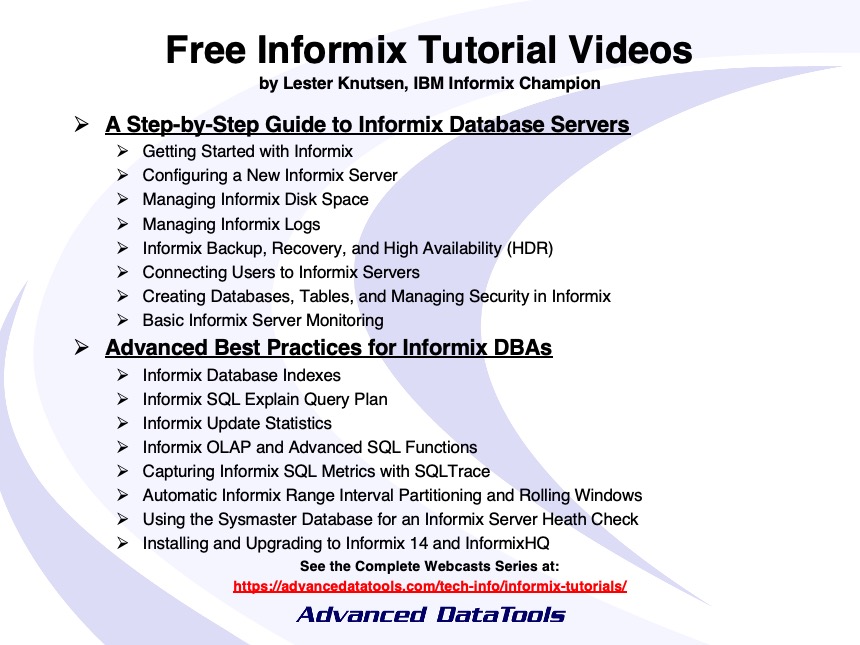
Credit: advancedatatools.com
Frequently Asked Questions On Step-by-step Guide On Creating And Configuring Databases?
How To Create Database Step By Step?
Choose a database software like MySQL or PostgreSQL. Install the chosen software. Open the database management interface. Select the “Create Database” option. Name your database and configure settings. Complete the process to establish your new database.
What Are The 5 Steps In Database Creation?
Define the database’s objectives. Select and install a database management system (DBMS). Design the database structure. Create the database using the DBMS. Input and organize the data.
How To Do Database Configuration?
Start by selecting a database management system (DBMS) suitable for your project. Install the DBMS software, following the provider’s instructions. Open the configuration file. Use the management interface to adjust settings. You can adjust memory allocation, security options, and network access.
Save changes and restart the service.
What Are The Six Steps To Design The Database In Dbms?
Identify purpose with requirement analysis. Conceptual design involves creating an Entity-Relationship (ER) model. Proceed to logical design by mapping the ER model to a relational schema. Conduct normalization to optimize structures. Physical design requires defining storage and data access methods.
Finally, test and refine the design.
Conclusion on Guide on Creating And Configuring Databases?
Creating and setting up a database can seem daunting. However, it’s a vital skill for efficiently managing data. This step-by-step guide aims to simplify the process. It ensures a smooth, accessible journey from start to finish. By following the outlined instructions, you’ll be able to store, organize, and retrieve your data effectively.
Embrace the challenge, and you’ll master database management in no time.


